Overview
What is Distributed Load Testing?
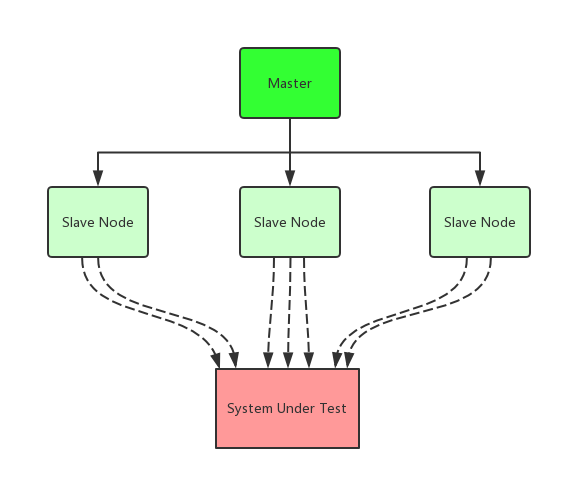
In my previous post http load testing with wrk2, we’ve introduced some of the concepts of HTTP benchmarking. However that is not the only case, especially when the client is not as performant as the target server. More often, system developers use multiple clients (load testing clusters) to generate more loads. As shown with the picture:
Why locust?
There’s lots of open-source aimed at distributed load testing, like:
locust gatling artillery vegeta tsung jmeter
While some of them are quite promising, in this post we choose locust, for it’s one of the most popular in github and it’s very easy to use and demo.
Simple local test
Next, let’s start with a simple case to show how developer perform distributed load testing with locust.
example workflow
Install locust package
1 2 | |
Edit locustfile.py, the simplest one:
1 2 3 4 5 6 7 8 9 10 11 | |
In fact, locust supports user scenarios by this kind of python script, which is very customizable.
Start master
1
| |
Start slave
1
| |
Finally, go to master web-ui (default port on 8089), and start spawning locust!
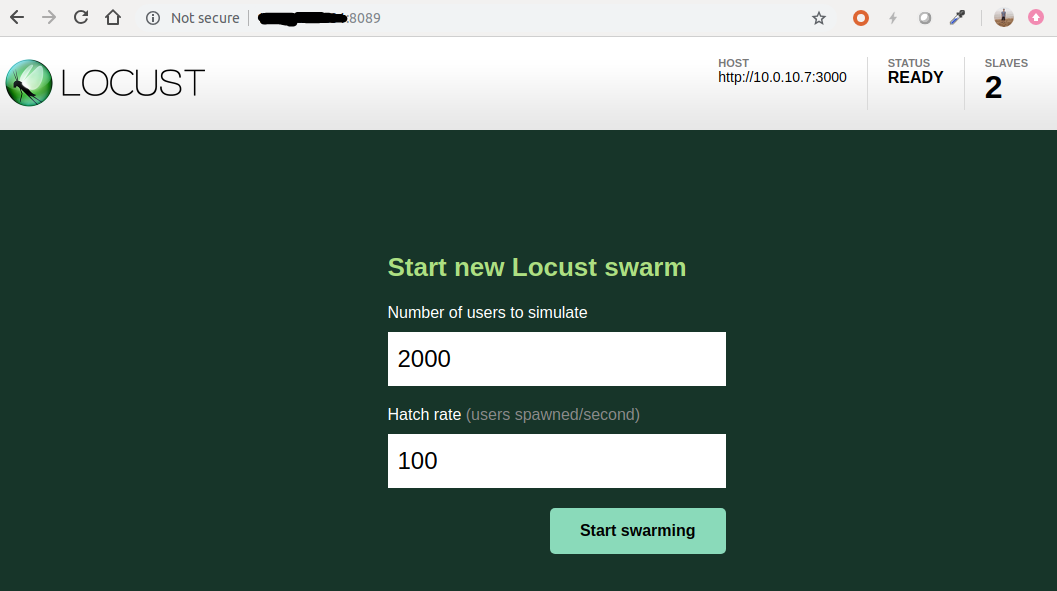
Before launching, we should specify our expected number of users, and the hatch rate.
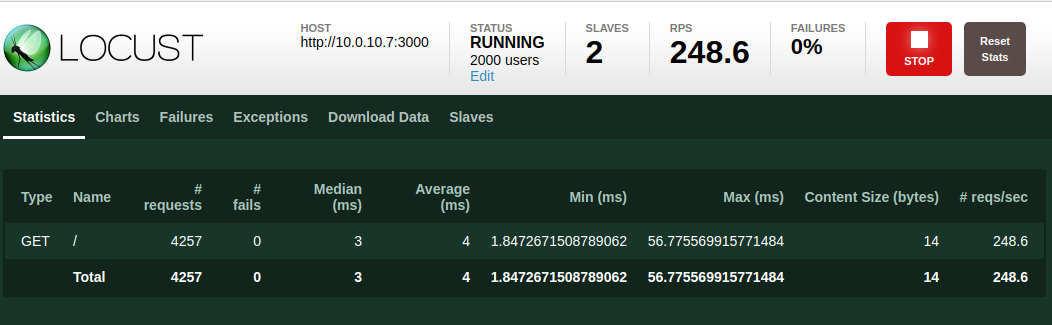
When testing, locust web-ui provides real-time statistics for us, including RPS, Response Time.
- Trouble shooting
You’ll get too open files issue if you forget to set it with ulimit command.


problems with locust
Python is not a fast language, the problem is even exacerbated when it comes to the IO-intensive application. Fortunately, locust is designed and implemented to be well scaled out, and the problem can be ameliorated a lot.
AutoScaling cluster on cloud
For deploying locust testing on cloud, the most suitable product is cluster management service, no matter whether it’s the cluster for virtual machine (AutoScaling), or the cluster for container (Kubernetes Service). In this post, we conduct our load testing with AutoScaling of TencentCloud.
First, we build our locust image in which the locust package is installed and locust file is prepared. Second, we create our testing cluster, namely an AutoScalingGroup of our test LaunchConfiguration, which is an instance template associated with the locust image we just build. Additionally, we need to make sure that our testing cluster and target host are in the same VirtualPrivateCloud, so that they can access each other within the private network and cost little for network bandwidth. And setup the External IP as well as the Security groups for locust master node, as we’ll access its port 8089 for the web-ui.
Now that we’ve set up our load testing cluster, we could tune its Expected Instance Number on our demand.
- When to add client?
Usually, as long as the final RPS increases proportionally with the number of clients, we should consider add 1 more client. In our example, 6 clients proved to be just enough.
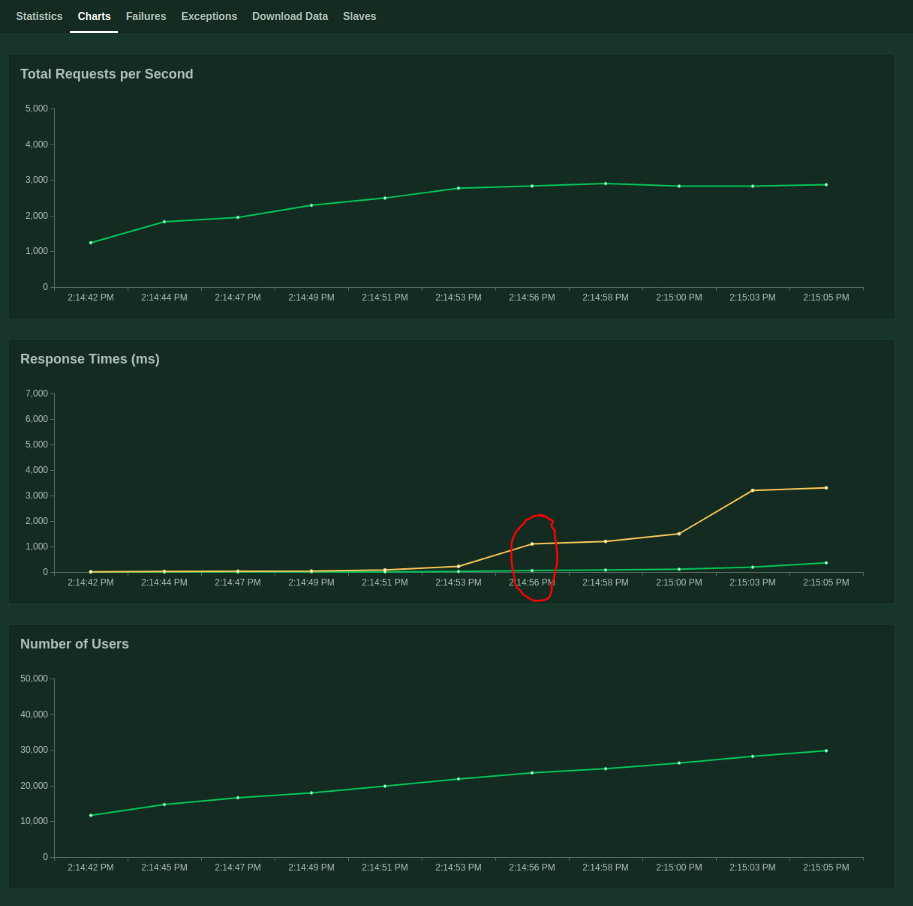
- How to inspect the chart to find the best performance?
When the QoS is no longer satisfied, there comes the point. As the above chart shows, the p95 is longer than 1s when the number of concurrent user reaches to 22K, and the RPS is 2830 by that time. That’s it.
Conclusions
By this post, we’ve completed an example of distributed load testing. Although there’s a plenty of choice of testing tools, the locust is such an easy-to-use tool to help us understand the basic concepts. Thanks to the cloud-managed service like AutoScaling, we can manage our workload cluster with ease. And happy benchmarking!